Broker Setup
Choria Broker supports a concept called an Account or Organization, these are like a VLAN on your network switches.
Nodes partitioned into one Organization cannot communicate with nodes in any other Organizations unless special arrangements are made to facilitate that.
We use this feature to create an isolated network where unprovisioned servers wait for provisioning. When Choria Provisioner connects using fully verified credentials it gains access to these isolated Servers and can provision them.
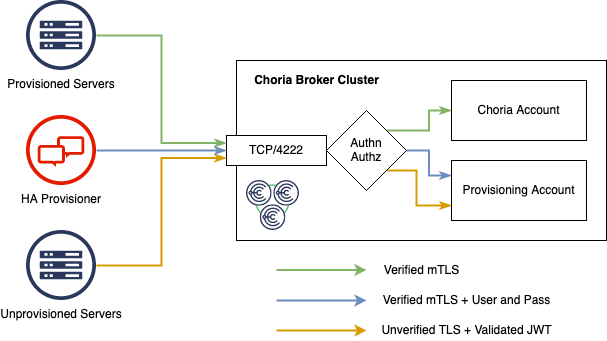
Here we show one Choria Broker Cluster with a Choria Account and a Provisioning Account active. Unverified connections enter the Provisioning Account automatically. The Provisioner connects with its fully verified credentials that identify it as a Provisioner and gains access to the unprovisioned servers.
Restrictions in the Choria Broker authentication layer ensures this separation is not optional and enforce control over what software gains access to the unprovisioned fleet.
Enabling the System Account
We suggest enabling the Choria Broker system account to allow introspection of nodes waiting to be provisioned and more.
Configure this in both your Broker and Client configurations.
plugin.choria.network.system.user = system
plugin.choria.network.system.password = system
Enabling the Provisioning Account
The Choria Provisioner will connect using its normal Certificate or JWT token which means it will appear just like any other client. To differentiate it we force it to connect to a specific user and password.
The password is unique per environment and should be configured in the broker:
plugin.choria.network.provisioning.client_password = provSecret
x509 Based Choria
If you are using an x509 based network you have to set the Public certificate that was used to configure servers.
plugin.choria.network.provisioning.signer_cert = /etc/choria/provisioning-jwt-signer.pem
Organization Based Choria
This applies only to Choria 0.27.0 and newer which is due to ship early 2023
If you are using an Organization Issuer you should already have the issuer configured and have used that issuer to sign the provisioning.jwt
plugin.security.issuer.names = choria
plugin.security.issuer.choria.public = 4ada2...cea4
Confirming
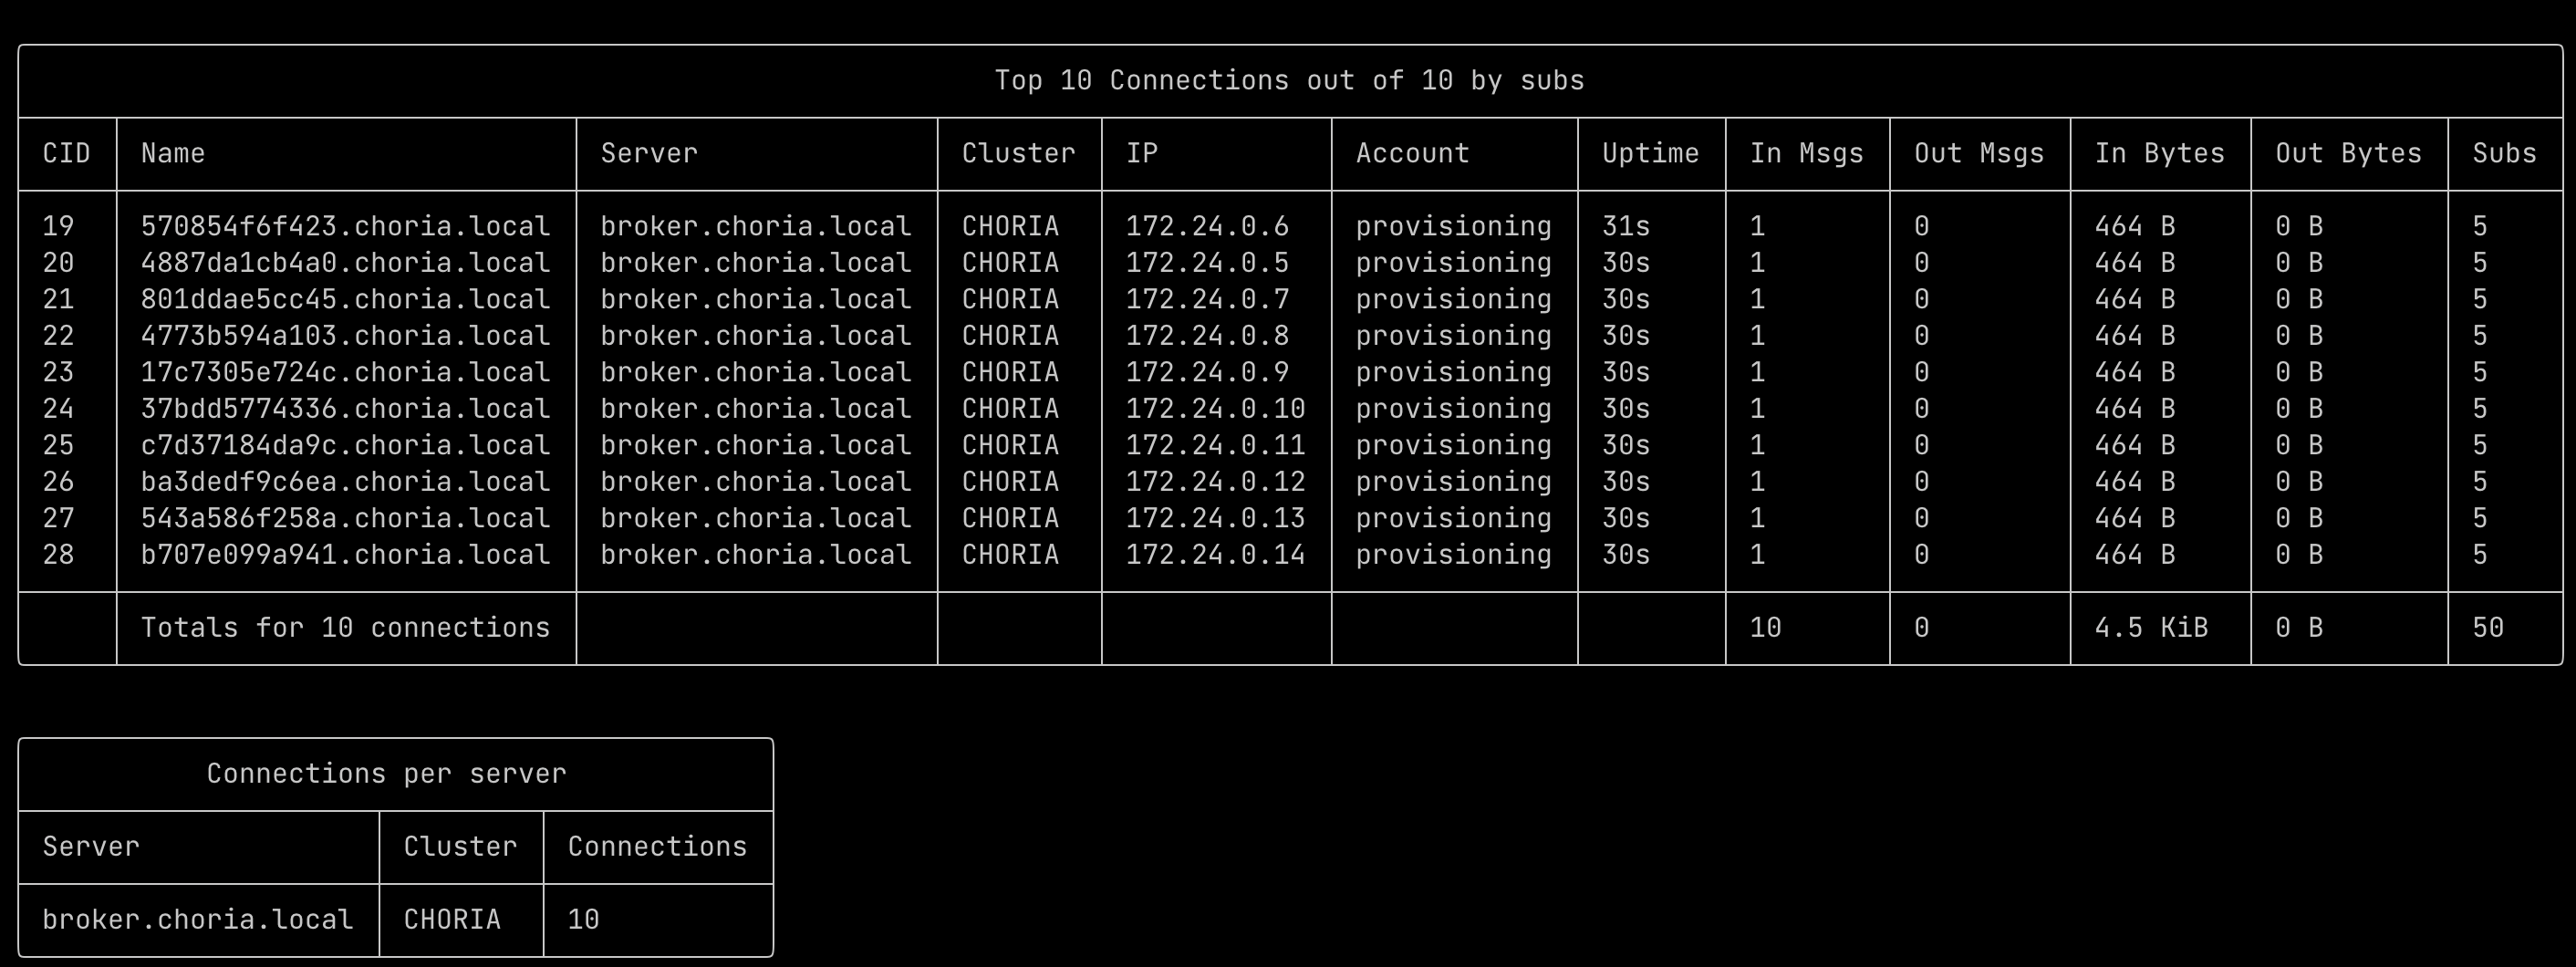
Once configured you can run the command choria broker server report conns --account provisioning to both confirm the account is active and it will show any connections made to this account. The Choria Provisioner will appear there as well as any machines being provisioned.